


Thinking about fitting a new sink and wondering how to install a kitchen sink without causing yourself a headache? Whether you are refreshing a tired kitchen or replacing a damaged basin, getting the kitchen sink installation right from the start will save you time, money, and no small amount of frustration. As local plumbing specialists, we have helped countless homeowners across the area with exactly this kind of job, and we know what it takes to get it done properly.
What You Will Need Before You Start
Before attempting any plumbing work, it is important to gather the right tools and materials. Trying to work with what is already to hand often leads to shortcuts that cause problems further down the line.
You will typically need an adjustable spanner, pipe wrench, basin wrench, silicone sealant, plumber’s putty, PTFE tape, a bucket, and a cloth or towel for catching any residual water in the pipes. You will also want to have your new sink, tap, waste kit, and any supply fittings ready before you begin.
If you are replacing an existing sink, make a note of the connections already in place. Understanding what is there helps you plan what fittings you will need for the new unit.
How to Install a Kitchen Sink: A Step-by-Step Guide
This guide covers a standard under-mount or inset kitchen sink replacement. If you are working on a brand-new installation or your setup involves unusual pipework, it is always advisable to consult a professional plumber before proceeding.
Step 1: Turn off the water supply. Locate the isolation valves beneath your existing sink and turn them off. If there are no isolation valves in place, you will need to turn off the water at the mains. Open the taps to release any remaining pressure in the system and allow the water to drain away fully.
Step 2: Disconnect the existing supply pipes. Using your adjustable spanner, carefully disconnect the hot and cold supply pipes from the tap tails. Have your bucket ready to catch any water left in the pipes. Once the supply is disconnected, remove the waste trap by unscrewing it from the waste outlet. You may find it easier to use a pipe wrench for this if it is tight.
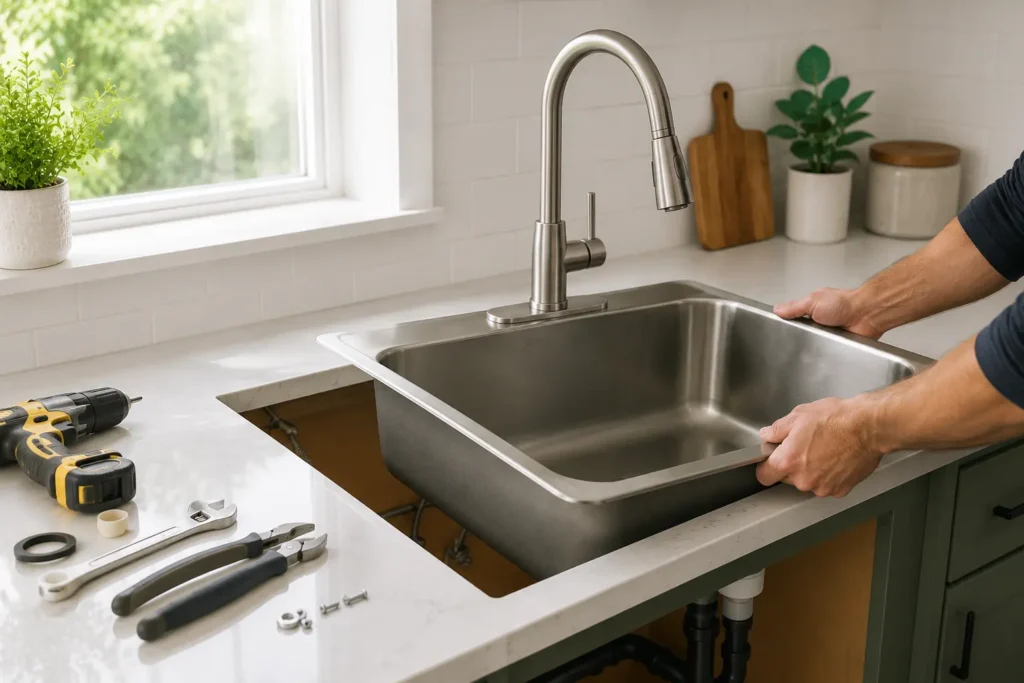
Step 3: Remove the old sink. Depending on how the old sink was secured, you may need to undo mounting clips from underneath. Run a Stanley knife along the line of the old sealant to break the seal before lifting the sink free. Clean away any old sealant from the worktop surface thoroughly before fitting the new unit.
Step 4: Fit the tap and waste to the new sink. It is far easier to fit the tap and waste fittings before the sink is in position. Follow the manufacturer’s instructions for your specific tap. Wrap PTFE tape around any threaded connections to ensure a watertight seal, and apply plumber’s putty or silicone around the waste outlet as directed.
Step 5: Position and secure the new sink. Apply a bead of silicone sealant around the underside of the sink rim (for inset sinks) before lowering it into the cut-out in the worktop. Press down firmly and wipe away any excess sealant. Secure the mounting clips from underneath to hold the sink in place, and allow the sealant to cure in line with the manufacturer’s guidance.
Step 6: Reconnect the supply pipes. Reconnect the hot and cold supply pipes to the tap tails, ensuring all connections are hand-tight before giving them a final quarter turn with your spanner. Avoid overtightening, as this can damage the fittings or cause leaks.
Step 7: Reconnect the waste. Fit the waste trap back into position, connecting it to both the sink outlet and the waste pipe. Check all joints are secure and that the trap is properly assembled.
Step 8: Turn the water back on and test. Restore the water supply slowly and check every connection carefully for any signs of dripping or leaking. Run both taps and fill the sink to test the waste is draining correctly and that there are no leaks around the trap or any of the supply connections.
Common Mistakes to Avoid
Even with the best preparation, there are a few common errors that can turn a straightforward job into a costly one.
Skipping the PTFE tape on threaded connections is one of the most frequent causes of slow leaks after installation. Similarly, applying too little sealant around the sink rim can allow water to seep under the worktop over time, causing swelling or rot in timber worktops.
Overtightening plastic fittings is another easy mistake to make. Hand tight plus a small fraction of a turn is usually sufficient. Going further risks cracking the fitting or stripping the thread.
Always test thoroughly before packing your tools away. A slow drip that goes unnoticed for days or weeks can cause significant damage.
When to Call a Professional
If you are at all unsure about any part of the process, or if you encounter unexpected issues such as corroded pipework, awkward access, or non-standard connections, it is always worth calling in a qualified plumber. A professional will have the right tools and experience to complete the job efficiently and to a standard that gives you confidence there will be no problems further down the line.
Let Us Handle Your Kitchen Sink Installation
At Chiltern Plumbing and Heating, we carry out all types of domestic plumbing work, from straightforward replacements to more complex installations. If you would rather leave it to the professionals and get it done right first time, we are here to help. Get in touch with us today for reliable kitchen sink installation from a local team you can trust.